
Greenleaf Annabelle Dollhouse Project
Chapter 7
A Looong Weekend
We've come a long way in 6 weekends, and most of the work hasn't been very difficult. Customizing the basic design of the house has been the most fun, but I outsmarted myself a little on this next part and ended up putting it off for several weeks. But I realized that I better get this house finished soon, I don't want it to sit half done for too long.
It seemed like such an easy idea. When I looked at the eaves, the exposed underside of the roof, it looked awful. There's some great wood strips avalable that simulate flat boards, the wood is scored every half inch or so. I thought it would look very realistic if it appeared that there were a bunch of boards holding the roof up, especially in the gables where the underside of the roof is obvious.
So I set out to cut pieces that would fit. Many hours later I had 28 individual pieces that had to be prepped and painted. Groan! Here we go again - one coat of Gesso and 3 coats of Ceiling White. This wood is so thin that even the Gesso manages to warp it a little, but we should be ok!
Then, we use Quick Grip to attach the sections to the eaves.
Once finished with that, we have to finish off the edge between the eaves and the fishscale siding. For that, we found this nice crown molding
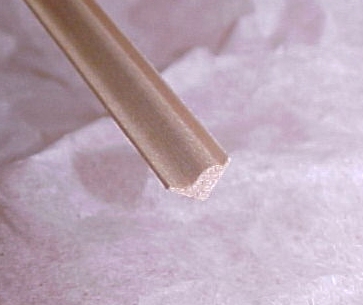
and will use that to hide the edges. As usual, 1 coat of Gesso and 3 coats of paint. We'll match the massive molding color - Violet Bouquet.
We attach the moldings and
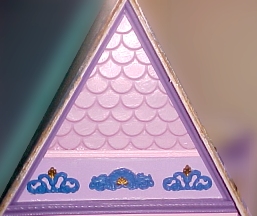
it looks great!
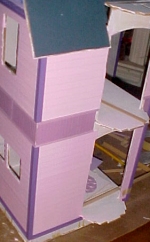
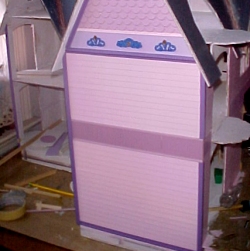
I'm liking this color more and more, so let's use it again. We're all finished with the siding, now it's time to cover up those rough edges. By using 90 degree angle boards, we can cover this up easily. You know the routine, Gesso and 3 coats, more Violet Bouquet. We'll need large angle trim for around the dining room extension, so we'll a wider angle trim
We'll box out the bottom edge with another type of fancy trim, also painted our cool violet color.
Windows
Although the Annabelle comes with a full set of "windows", we decided to scrap most of them and step up to the pre-made set of 19 working windows specifically made for this house.
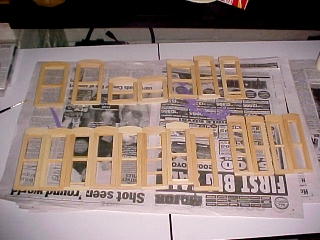
Prepping the windows takes a lot of time - 19 window frames and 76 sash edges, 1 coat of Gesso and 3 coats of Violet Petal. This matches the background of the upper band around the house. We don't want to glue the windows in yet, we don't have any idea what we'll do with the interior yet, so we'll keep them available for additional work later.
Copper Flashing
I was at it for weeks, spraying down the copper every day with water. It was starting to tarnish a bit, but nothing substantial, and certainly none of that green color we were hoping for. We searched around a bit and found a lot of highly technical discussions about copper, but they all seemed to involve dangerous chemicals.
Finally, Deb posted a question about it and Judie was nice enough to give us the answer: vinegar and salt. We had some rice vinegar handy, mixed some up with a bunch of salt, and poured it into our spray bottle. We didn't want to get any vinegar on the house, so we had to get the copper strips off. Using the Exacto knife, we managed to get the pieces off, but they were a little wrinkled. Oh well, not a big deal.
We took the copper strips out to the garage and sprayed them heavily with the vinegar solution. We came back a little later and there was green liquid pooled in the copper. Wow, looks like this is doing it! We continued this for a couple of days and built up a thick green crust on the copper. But the crust flakes off if you move the copper around too much, and our wrinkled strips were a big problem. Not only that, but we treated the copper so much, that it was thin, brittle, and nearly rotted away.
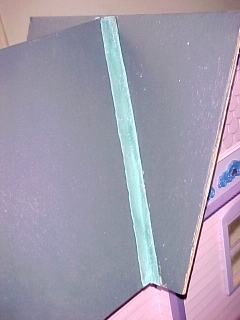
So, new copper strips are what we need. We cut them out, get them fitted properly, and instead of attaching them, we put them through a similar treatment. This time we lightly mist the copper, dampening it instead of wetting it. We cover it with a newspaper tent so that the moisture stays close for as long as possible. A couple of hours later we have a light green tint on the copper. Several more light treatments over the weekend yield a really nice blue-green verdegris. A tiny bead of glue on the roof and we gently place the copper back on the house.
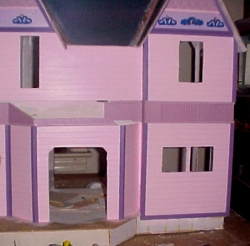
We'll drop the painted windows into their openings for a quick photo so we can see the progress we've made
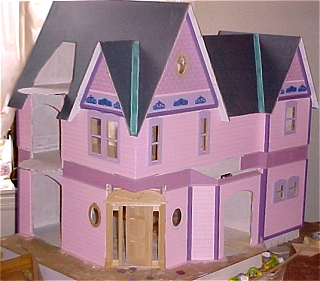
We've now completed seven weekends of work on the house. This represents several more hours of work spaced over several short sessions during the weekend.
What's Next
In the next chapter, we'll work on the tower and bay window sections and take care of a few more trim pieces and the dining room doors.
If you'd like to do this project along with us, we can special-order all the parts you need. Here's what we've bought so far:
Greenleaf Annabelle Dollhouse Kit $169.95
Cir-Kit Deluxe Wiring Kit $109.95
Real Wood Siding 24" x 3" with 1/2" board spacing $2.95 ea
Hobbyist Tool Kit $49.95
Brass Hammer $11.95
Gesso, 32oz bottle $11.95
metal file set $12.95
Assembled Curved Stairway $39.95
Sunburst Door
Clapboard Siding
Beadboard
Picture Frame Molding
Copper Foil
Quick Grip Cement
and other items which we'll update later.
You can get these supplies listed below in any hardware store:
2" width paint brush
sandpaper
masking tape
Carpenter's Wood Glue
Go to
CHAPTER 8
Return to Mainly Mini's