
Greenleaf Annabelle Dollhouse Project

I've also started on the roof shingles. I picked up 2 packages of 1,000 octagon butt cedar shingles for the job.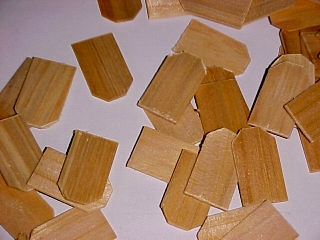
It took a long time to decide on the color, but I finally found something I like. The color is Plum, a very bright purple color, but I'm not going to paint the shingles directly.
Grabbing a big glass bowl from the kitchen, I pour a bunch of paint into the bowl, and then add some water. Then I dump the whole bag of 1,000 shingles in, and mix them up in the watery paint for about 15 minutes, constantly moving everything around until they're all covered with the gooey mixture.This is a very messy procedure, I got paint all over me and all over the sink.
Beforehand, I prepared a large sheet of cardboard by dumping about a quarter pound of uncooked spagetti on it and spreading it out. Next, I take the shingles out of the bowl in small handfulls and spread them around on the cardboard, trying to make sure not too many stick together. After leaving them to dry overnight, I gather them up and dump them in a box. I repeat the whole thing again with the other bag of shingles and mix them all together.
The first section to work on will be the porch roof sections.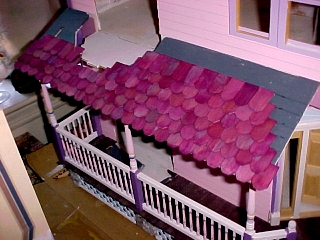
I work on the big flat sections first, and leave a little extra shingle hanging over the edges. Once I start working on the small section near the dining room, I have to place the porch roof onto the house so that the angle is correct before adding those shingles.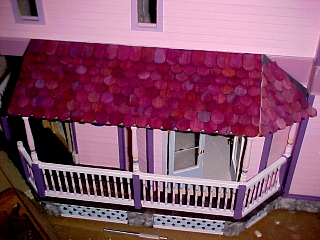
The shingle work is easy and fun when doing the middle parts. We use 2 rows of Tacky Glue on the roof, and then lay the shingles on the glue. It sticks right away and holds on the steeply sloped roof, but still allows for adjustments when a row isn't straight.
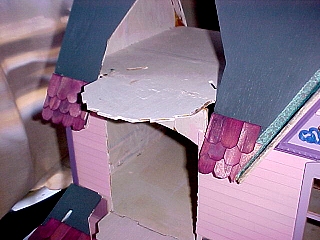
The installation gets very difficult at the edges, especially with all the angled gables on this house.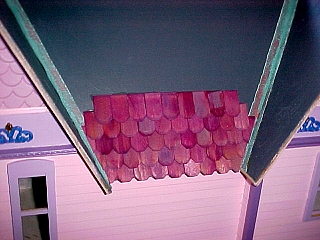
This has slowed me down quite a bit, and I've sorta been avoiding it for a while. Cutting the shingles isn't difficult, but cutting them correctly is very hard!
I've also started working on the front entry, but I still haven't decided how to finish it. I put 3 shades of purple around the edge, and painted t the background of the sunrise in Baby Blue.
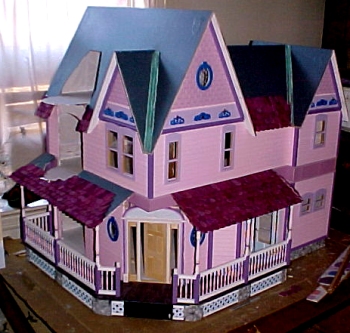
That completes our eleventh chapter on the house. We can't really call it weekends anymore since we're spacing the work out over a longer period of time. In any case, here's what our Annabelle looks like now:
Greenleaf Annabelle Dollhouse Kit $169.95
Cir-Kit Deluxe Wiring Kit $109.95
Real Wood Siding 24" x 3" with 1/2" board spacing $2.95 ea
Hobbyist Tool Kit $49.95
Brass Hammer $11.95
Gesso, 32oz bottle $11.95
metal file set $12.95
Assembled Curved Stairway $39.95
Sunburst Door
Clapboard Siding
Beadboard
Picture Frame Molding
Copper Foil
Quick Grip Cement
and other items which we'll update later.
You can get these supplies listed below in any hardware store:
2" width paint brush
sandpaper
masking tape
Carpenter's Wood Glue